|
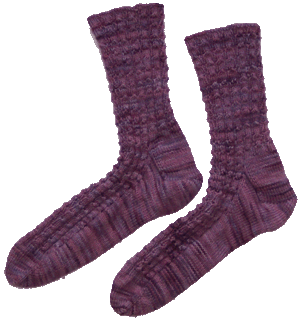 More and more knitters are making socks for themselves or for others. Socks are portable so they are easy to carry with you. And there is nothing like a gift of a handknit pair of socks as a way to say “I love you.” If you have a video or tip you would like to see added to this page, please email Deborah at DeborahKnits@gmail.com More and more knitters are making socks for themselves or for others. Socks are portable so they are easy to carry with you. And there is nothing like a gift of a handknit pair of socks as a way to say “I love you.” If you have a video or tip you would like to see added to this page, please email Deborah at DeborahKnits@gmail.com
Bind-Offs
- Jeny's surprisingly stretchy bind off
This bind off by Jeny Staiman is especially good for the cuffs of toe-up socks. Easy to do and so very stretchy.
Written directions.
Cat Bordhi’s video
Converting a 4-dpn pattern to the Magic Loop
- A lot of sock patterns are written specifically for a set of 4 double pointed needles. It may be confusing to try to convert this to your favorite method of knitting socks: 5 dpns, Magic Loop or 2 circular needles. Use markers to distinguish between the needles.
Your markers will have to be distinctive. Use different colored markers and put them in alphabetical order. For example, the blue marker will be #1; the green marker, #2; and the red marker, #3. Follow the directions for 3 needles. The pattern usually tells the knitter how to divide the stitches over 3 needles. After the required stitches for the first needle, place marker #1. Repeat for the second and third needles.
Heels
- Eye of Partridge
Creates a honeycomb pattern that is great for a sock’s heel flap.�It adds durability.
| |
Even number of stitches
Row 1: S1, *K1, S1 * across ending K1.
Row 2: S1, P across.
Row 3: *K1, S1 * across ending K2.
Row 4: S1, P across. |
Odd number of stitches
Row 1: S1, *K1, S1 * across ending K2.
Row 2: S1, P across.
Row 3: *K1, S1 * across ending K1.
Row 4: S1, P across. |
- Evenly tensioned heels
Did you know that most people purl looser than they knit? It may be a problem for sock knitters. Socks are usually knitted in the round. When knitting heels, though, the knitting changes to back and forth on two needles. The result may be sloppy heels.
Since gauge is determined by the needle in the left hand (the needle in the right hand is just a dispenser for stitches to be worked), try purling with a needle one size smaller. That means that for the heel, you will be working with two different size needles.
—added May 7, 2012 from Cat Bordhi’s New Pathways for Sock Knitters
Ladders
- When knitting with double-pointed needles, the stitch between the needles becomes stretched and creates what looks like (and is refer to as) a ladder. To avoid this, work the first on the new needle as you usually do. There is no need to tighten it; just knit it. Now knit the second stitch and give it a good tug to tighten it up. Do this every time you change needles. This really works!
—added March 31, 2012 from Cat Bordhi’s New Pathways for Sock Knitters
 Another way to help avoid ladders is to bring your empty needle under the right hand needle that has the stitiches you just worked on it. Combine this with tightening the second stitch as explained above and your ladders will be gone! Another way to help avoid ladders is to bring your empty needle under the right hand needle that has the stitiches you just worked on it. Combine this with tightening the second stitch as explained above and your ladders will be gone!
—added July 15, 2012
Patterns
- Create your own designs. Find a lace or cable pattern that you think will make a nice design for a sock. Actually any pattern will work. A good source of these patterns is the Barbara G. Walker "Treasury" Books. Now use your favorite architecture: toe, heel, gusset increases. Incorporate the pattern and you will have a unique pair os socks. Here are a few designs with further explanation to help you get started.
—added March 7, 2014
Single-Sock Syndrome
- As soon as you finish the first sock, cast on for the second sock. Do not wait until tomorrow. Do not wait until you finish another project you are working on. Cast on for that second sock now!
- Whether knitting toe-up or cuff-down socks, knit to a few rows beyond the heel turn and ensure that the sock fits. On another set of needles, begin the second sock. When you have finished this sock, go back to your first sock; you have only the foot (cuff-down) or the heel flap and cuff (toe-up) to finish.
—added August 19, 2012
- Learn how to knit two socks at a time using the Magic Loop. Here are the directions for the Magic Loop. KnitPicks offers a very good pattern for knitting toe-up socks, two at a time, using this technique. This video demonstrates cuff-down, two at a time.
—added August 19, 2012
Toes
- Judy's Magic Cast-on for Toe-up Socks (or Toe-up Star Toe)
Creates continuous stockinette stitch at the toe. This might take some practice.
Written directions
Video
—updated July 22, 2017 (changed video link)
- Judy Becker’s Cast-on on double-pointed needles
This creates a rounded toe and is so easy to do once you get the hang of it. It is the toe-up equivalent of the Star Toe.
Video by Cat Bordhi
Written directions (Download in .pdf format):
- Make a slip knot with a 6" tail and put it on the bottom needle.
- Wrap the working yarn around the needles three times by going to the back of the top needle and then over the top and towards you (Figure 1).
- With working yarn, knit the three stitches on the top needle.
- Rotate the needles so the slip st is on the top needle.
- Remove slip knot and undo so that you can knit with the yarn tail. With both yarn tail and working yarn, knit 3 stitches on each needle. You now have 12 stitches. (Figure 2)
- With working yarn, knit one round. In Figure 3, you can see the way the stitches flow over the toe.
- Next round: *K1, kfb (knit in front and back of stitch); repeat from * around (18 stitches).
Optional: Use a lifted increase instead: K1, right-slanting lifted increase in next stitch; knit that stitch
- Knit one round.
- Next round: *K2, kfb (knit in front and back of stitch); repeat from * around (24 stitches).
Optional: Place a marker after every increase.
- Repeat the last 2 rounds increasing 6 stitches each round until you have the desired number of stitches. Move to 3 or 4 needles when you have enough stitches to knit comfortably.
—revised August 28, 2012
- Star Toe for Top-Down Socks
The result of this toe is the same as Judy Becker’s Cast-on on double-pointed needles. It is very easy to do and you will have a rounded toe.
- The number of stitches you have has to be divisble by 2. Divide the number of stitches by 6. Decrease the remainder evenly around.
- Place markers dividing the toe into 6 sections.
- Round 1: K2 together after each marker.
- Round 2: K.
- Repeat these 2 rounds until 6 sts remain, ending with Round 2.
- Cut the yarn leaving a 6" tail. Using a yarn needle, thread the yarn through the remaining sts.
- Pull tight and weave in the tail.
|