|
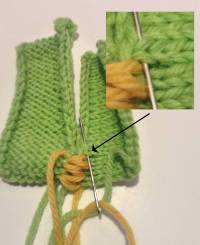
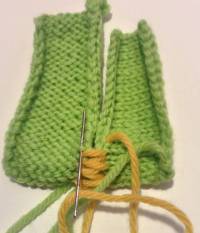
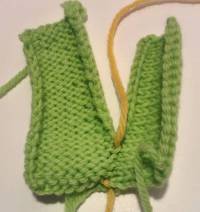
There are a lot of tutorials on the Internet and in books that discusse seaming reverse stockinette stitch. But I have yet (as Of August 24, 2013) been able to find any information concerning seaming reverse stockinette to an edge bound off in reverse stockinette stitch or in stockinette stitch. I offer my solutions to those knitters who have long been frustrated when seaming reverse stockinette stitch.
The directions for seaming reverse stockinette to reverse stockinette are included so that this page is complete.
A note about Seaming: Most Knitters hate to seam (or sew as some refer to it). In my opinion, I think that is because we learn to knit and then we knit following directions. There are three reasons why knitters generally so not seam. First, we never learned to seam. Second, most directions do not include the seaming technique to use. These directions often state to “sew the seams.” So we do our best and are usually disappointed with the result. Third, proper seaming takes time; whipping the seams together is quick. Learn how to seam properly and you may discover that it is not such a chore--once you know how!
Before you begin:
- Begin your seams with a figure 8.
- If using the tail, insert the needle in the lowest corner stitch of the opposite piece from back to front. (See this tip about using tails.) Then insert the needle in the lowest corner stitch of the piece with the tail. It looks like a figure 8. Pull up snugly and you are ready to begin.
-
- As you seam your pieces, keep the stitches a bit loose. After you have three or four stitches seamed together, pull up the yarn to close the seam. Almost like magic, your seam will be almost invisible. Just do not pull up too tightly!
- Smiles and Frowns: Many directions, these include, refer to the parts of a reverse stockinette stitch as “frowns” or the “smiles.”
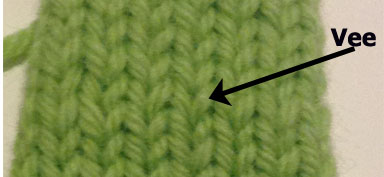
- Vee’s: The stitches resulting from stockinette stitch are often referred to as “V’s.”
 |
 |
Smiles and Frowns |
Vees |
Let's Start Seaming
Seaming to a Reverse Stockinette Stitch to Reverse Stockinette Stitch
 |
 |
 |
 |
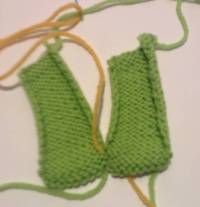 |
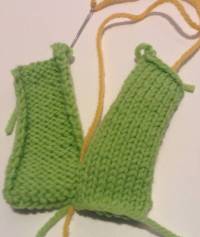
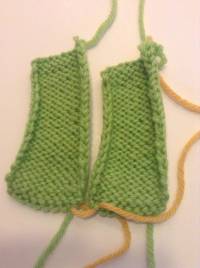
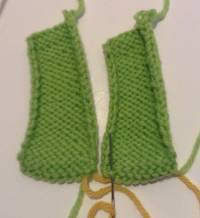
| Step 1: Insert the needle under one of the upper bumps (the “frown”) of the right-hand piece. (It does not matter whether it is the “frown” or the “smile”; just be consistent.) Bring the needle up and pull the yarn through. |
Step 2: Insert the needle under the corresponding the lower bump (the “smile”) of the left-hand piece. and pull the yarn through |
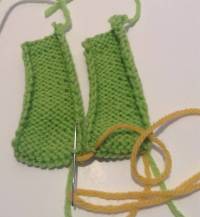
Repeat Steps 1 and 2 until you have seamed several stitches on both sides. |
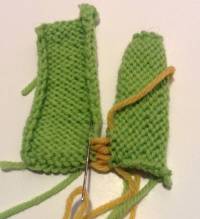
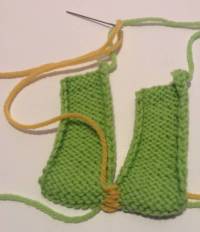
Here Steps 1 and 2 have been completed 4 times. |
Pull the yarn snug, not tight and watch the stitches disappear! |
Seaming Reverse Stockinette Stitch Edge to Stockinette Edge
- Begin with a figure 8.
|
|
 ; |
|
|
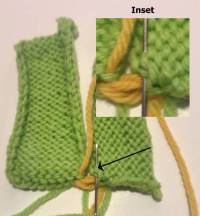
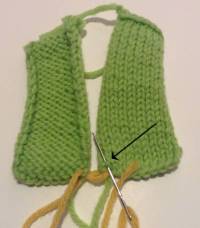
| Step 2: Insert the needle one stitch in from the right side edge. Bring up through one strand of yarn. (You are working to the immediate left of the second stitch.) |
|
Step 3: Insert the needle under one of the upper bumps (the “frown”) of the right-hand piece. (It does not matter whether it is the “frown” or the “smile”; just be consistent.) Bring the needle up and pull the yarn through. Note that this is the same as Step 1 for seaming reverse st st to reverse st st.
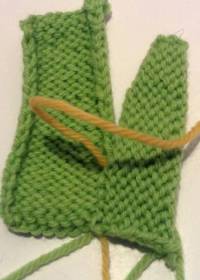
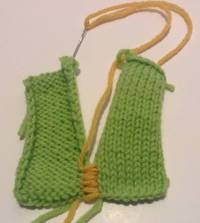
This image shows the seaming after completing Steps 2 and 3 several times. |
|
Step 4: Pull the ends snug, not too tight and watch an invisible seam emerge.
Repeat Steps 2 – 4 until the entire seam is completed. |
Seaming to a Reverse Stockinette Stitch Bound-off Edge
It is important to note that you will have more rows than bound-off stitches. So every three or four times, go through two of the bumps on the vertical piece. Counting your stitches and rows will aid in letting you know what the ratio of stitches to rows is.
- Begin with a figure 8.
- Insert the needle under one of the bumps of the vertical piece. (It does not matter whether it is the “frown” or the “smile”; just be consistent.) Bring the needle up and pull the yarn through.
Repeat these two steps. It is important to note that you will have more rows than bound-off stitches. So every three or four times, go through two of the bumps on the vertical piece. Counting your stitches and rows will aid in letting you know what the ratio of stitches to rows is.
|
|
|
| Step 3: Insert the needle under the bound-off stitch on the bound-off edge and bring the needle up. Pull the yarn through. |
This image shows the seaming after completing Steps 2 and 3 several times. |
Step 4: Pull the ends snug, not too tight and watch an invisible seam emerge.
Repeat Steps 2 – 4 until the entire seam is completed. |
Seaming to a Stockinette Stitch Bound-off Edge
It is important to note that you will have more rows than bound-off stitches. So every three or four times, go through two of the bumps on the vertical piece. Counting your stitches and rows will aid in letting you know what the ratio of stitches to rows is.
- Begin with a figure 8.
- Insert the needle under one of the bumps of the vertical piece. (It does not matter whether it is the “frown” or the “smile”; just be consistent.) Bring the needle up and pull the yarn through.
Repeat these two steps.
|
|
|
Step 3: Insert the needle under the “V” of the bound-off stitch on the bound-off edge and bring the needle up on the other side of the “V”. Pull the yarn through.
|
This image shows the seaming after completing Steps 2 and 3 several times. |
Step 4: Pull the ends snug, not too tight and watch an invisible seam emerge.
Repeat Steps 2 – 4 until the entire seam is completed. |
|


 ;
;