Applied I-cord
Joining two stockinette seams 
Place left side sts on a circular or double-pointed needle (depending on the number of stitches) and cast on 3 sts.
Place the left most stitch of the right side on the lefthand needle.
You now have all the stitches from the left side
plus 4 stitches on the lefthand needle.
K2tog, k1, ssk; slip 4 sts back to left needle (the 3 sts just worked and one from the right side).
When 5 sts remain, k2tog, k1, b/o those 2 sts, ssk, b/o remaining 2 sts.
—revised October 1, 2025
Binding off (Printable Page)
There are enough tips so this deserves its own page.
—updated March 16, 2021
Blocking
Ribbing at the bottom of a sweater and its sleeves, as well as the neckband, tightens the sweater just a bit in those areas. If you overblock the ribbing, it may not function as desired. A friend blocked her Fair Isle hat ribbing and the hat just slid down over her face!
When blocking a sweater, pin just above the ribbing. The ribbing will stretch slightly but will not lose its stretchiness.
—added March 22, 2016
Bobbles (Printable Page)
There are quite a few ways to improve your bobbles. Click here to read the tips.
Buttonholes (Printable Page)
Go to Buttonhole page for a couple of buttonhole techniques.
—updated March 27, 2025
Button Placement
- Placing buttons directly across from buttonholes is always a bit of a hassle. To make placement easier, knit buttonholes on both the front and left sides of the sweater. Now when you are ready to sew on the buttons, place them over the buttonholes on the side of the sweater that did not call for them. The holes will be at least partially closed and the buttons will cover them up. This, of course, will not work if the buttonband is knit separately and then sewn on.
—added November 13, 2014, from Linda McKie of the NOPL Knitters
Cable Tips (Printable Page)
- Counting Cable Rows
 Want to avoid cables of different lengths. You can attach a marker to the the cable row
and count the rows. Or you can use a row counter (and hope you do not forget to use it at the end of each row). Want to avoid cables of different lengths. You can attach a marker to the the cable row
and count the rows. Or you can use a row counter (and hope you do not forget to use it at the end of each row).
Here is what I think is a great idea to count rows. An opening is made where the cables cross. Put a needle through that opening to the back and out the front directly under the needle. Now count the ladders. The first one is the cable row. In this example, the cable row is repeated every 6th row. Quicker than moving a marker and more reliable than using a row counter!
—added November 29, 2011 from Lucy Neatby’s Knitting Gems 3
- Cable Flare
Cables pull fabric widthwise and can cause pleats of flare at the top and bottom of the fabric. To prevent this, cross your cables as soon as possible after casting on or near a bind-off edge. Also, you can decrease one or two stitches over the cabled sections as you bind off. The best bind-off is immediately after a row where the cables are crossed.
—added March 21, 2013
- Cable Knit Fix
For many knitters, the left-most knit stitch on cables tends to be oversized. The trick to preventing this involves the purl stitch to the left of the offending knit stitch. On the right side rows, work the offending knit stitch the way you normally would. Then when working the purl stitch immediately to its left, insert your right-hand needle into the stitch purlwise as you normally would, but wrap the yarn around the needle in the opposite direction—clockwise instead of counterclockwise—as you purl the stitch. On the next row, this stitch will present itself to you as a twisted knit stitch. Knit it through the back loop to untwist it.
(from Melissa Leapman’s Cables Untangled)
- Charting Cables
Charting cables can be quite daunting. Fortunately, we have options to make this task easier.
- sconcho is an easy-to-use program and is free. The user can create his/her own symbols using Inkscape, a free drawing program. A tutorial to do this is available. This open-source software has one disadvantage. It is not easy to install. Find it here.
- Intwined Pattern Studio is available for download or on CD for $44 (as of January 26, 2014). It uses its own set of symbols. The user can create symbols using Inkscape. I have charted many of the symbols using Barbara G. Walker’s symbols from Charted Knitted Designs: A Third Treasury of Knitting Patterns. You can find my symbols here. The biggest advantage of this program is that it writes out the directions as you insert the symbols. So your pattern can be charted and in words.
So put away the pencil and graph paper and digitally chart your own cable patterns. Just be sure your stitches are rectangular, not square, and you will be charting in no time!
—added January 26, 2014
- Following Cable Charts
Cable chart patterns can be difficult to follow. All of the lines and dots can run together and we spend a lot of time searching out the correct symbol from the key. Try color-coding them. Use color pencils and color the lines (or the squares) of each of the different symbols; then color the same symbol on the key. Now your eye will be drawn to the colors.
—added March 29, 2025
Casting on (Printable Page)
There are enough tips so this deserves its own page.
—updated October 22, 2013
Charts
- Here is a link to an excellent lesson about how to read charts. Click here.
—added June 14, 2017
 Following Cable Charts Following Cable Charts
Cable chart patterns can be difficult to follow. All of the lines and dots can run together and we spend a lot of time searching out the correct symbol from the key. Try color-coding them. Use color pencils and color the lines (or the squares) of each of the different symbols; then color the same symbol on the key. Now your eye will be drawn to the colors.
Crochet (Printable Page)
There are enough tips so this deserves its own page.
Decreases (Printable Page)
There are enough tips so this deserves its own page.
—updated February 2, 2019
Double (Reversible) Knitting
- Casting on
Use a tubular cast on to make a virtually borderless fabric at the beginning of the piece.
- Binding off
Use a tubular bind off to make a virtually borderless fabric at the end of the piece.
Double-pointed needles
- When you reach the end of a double-pointed needle, work two or three stitches from the next needle onto the working needle. This will prevent a line of loose stitches between needles and prevent a “line” (ladder) running up the piece.
- When knitting with double-pointed needles, the stitch between the needles becomes stretched and creates what looks like (and is refer to as) a ladder. To avoid this, work the first stitch on the new needle as you usually do. There is no need to tighten it; just knit it. Now knit the second stitch and give it a good tug to tighten it up. Do this every time you change needles. This really works!
—added March 31, 2012 from Cat Bordhi’s New Pathways for Sock Knitters
 Another way to help avoid ladders when knitting the first stitch on the next needle is to bring your empty needle under the right hand needle that has the stitches you just worked on it. If the first stitch on the next needle is a purl, bring the empty needle over the right hand needle. Combine this with tightening the second stitch as explained above and your ladders will be gone! Another way to help avoid ladders when knitting the first stitch on the next needle is to bring your empty needle under the right hand needle that has the stitches you just worked on it. If the first stitch on the next needle is a purl, bring the empty needle over the right hand needle. Combine this with tightening the second stitch as explained above and your ladders will be gone!
—revised October 22, 2013
Duplicate Stitch
Use these tips to fully cover your stitches and neaten them.
- Always work vertical lines from bottom to top. Alternate the direction every other stitch, i.e. insert the needle under the V from left to right. On the next stitch, insert it from right to left.
- Always work diagonal lines from bottom to top and insert the needle under the V in the direction of the slant.
- When working a horizontal row, insert the needle in the same direction you are working. For example, if working from right to left, insert the needle under the V from right to left.
Fair Isle (Printable Page)
- There is a whole page devoted to this topic. Click here for my Fair Isle tips.
—updated November 21, 2013
Garter Stitch
- Counting garter stitch is quite easy. Knit two rows. There will be a ridge on the right (public) side, which indicates that you have knitted 2 rows. Mark that ridge and knit away. Count 2 rows for every 1 ridge.
—added May 14, 2011, from Jean Greenhowe's "Jiffyknits"
- Garter stitch in the round
Most knitters dislike purling, but if you want garter stitch in the round, the convention wisdom is that you knit a round then purl around.
Knit to the end of the round. *At the beginning of the next round, bring the working yarn to the front; slip the next stitch; bring working yarn to the back; slip wrapped stitch back to original needle. Pull wrap tightly. Turn and knit to end of round. (You will be knitting on the inside of the piece.) Repeat from *. You will no longer have to purl to achieve garter stitch in the round!
—revised April 4, 2020, Liat Gatt, KNITFreedom
- Weaving Garter Stitch: Click here for directions.
—revised August 2, 2016
Gauge
- Knitting in the round
Most knitters knit a bit more tightly than they purl or vice versa. So a gauge swatch knitted flat will not be accurate. (Click here to read “The Importance of Gauge.”) To obtain an accurate gauge, cast on the required number of stitches for your swatch onto a double-pointed needle. Knit the first row; * slide the stitches to the opposite end of the needle. Carry the yarn loosely along the back and knit another row. Repeat from * until you have the length you need to properly measure your gauge. You will have long loops along the back but you are always knitting.
—added January 30, 2012
- Save your gauge swatch until your project is completed. You may want to refer to it as you are knitting. If you need the yarn to finish the project, you can always rip it out.
—added January 30, 2012
- Not all needles the same size knit to the same gauge when using identical yarn. For example, if using 5 mm bamboo needles with Cascade 220, your guage will be slightly different than if you use KnitPicks 5 mm nickel-plated needles. Gauge will also change if you use a different worsted yarn, even if it has the same weight and yardage. Always check your gauge.
—added August 7, 2016
- How to knit a gauge swatch
For this discussion, let’s say that the pattern states gauge is 20 sts x 25 rows = 4" x 4" in stockinette stitch (a typical swatch). Cast on 24 sts (20 + 4). Knit for 3 rows.
Row 4: K2, p across to last 2 sts (20 sts), k2.
Row 5: K.
Repeat these to rows for a total of 25 rows in stockinette stitch.
Measure your swatch between the garter rows and border. If it measures 4" across, your gauge is correct. If not, use a larger or smaller needle, whichever to appropriate.
Remember! There is no such thing as being “True to gauge.” Always check your gauge.
Gloves
- Poke the finished fingers into the hand to keep them out of the way as you knit.
- To help eliminate the holes tha often appear at the base of the fingers, pick up and knit one or two more stitches than required when you begin a finger; then decrease the extra stitch or stitches on the first round of knitting.
- When ending the fingers or thumb, thread the tail through the remaining stitches twice. This will fill in the loops of the stitches and give the fingers and thumb a better finish.
I-cord
- Using two double-pointed needles, cast on 2, 3 or 4 stitches. *Knit the stitches. Do not turn. Slide the stitches to the other end of the needle, pull the yarn firmly and repeat from * to desired length.
- I-cord Bind-off 1
This will create firmness and give body to garter-stitch edges. *Knit to within 3 sts of the end of the row. With yarn forward, sl 3 as if to purl. Turn. K1 row. Repeat from *. Do not pull the yarn too tightly when turning or the border may look pushed in.
- I-cord Bind-off 2
At the beginning of the row to be bound off and using a knitted cast-on method, cast on 3 sts. *Knit 2 sts; knit 2 together through the back loops; slip the 3 stitches on the right-hand needle back to the left-hand needle. Repeat from * until 3 stitches remain. Bind off.
- Applied I-cord
- I-Cord Edge
This will add an i-cord to the selvedge to a finished piece.
Pick up stitches along the edge. You do not have to pick them up all at once.
Using a cable cast on, cast on 3 stitches. You can continue with a working yarn if available; otherwise use a new yarn. (Try a contrasting color!)
*K2, slip 1 knitwise, k1; pass slipped stitch over last knitted stitch; slip 3 sts purlwise back to right needle. Repeat from *.
When edge is completed, bind off.
Note: you can slip 1 purlwise and it will slightly change the look of the edge.
—added August 29,, 2021
Increases
- 1-to-3 stitches: Here is a nice way to increase from from 1 stitch to 3 stitches.
In the stitch to be increased to 3 stitches, knit in the back and the the front of the stitch.
Insert the left hand needle point between the vertical strand running between the 2 sts just made.
Knit into this strand, the third stitch.
—added February 13, 2012, Alice Starmore, "Aran Knitting"

- Lifted Increases:
- Left Lifted Increase: Insert the left needle in the left side of the stitch 2 rows below the stitch on the right-hand needle. Lift it and place on left-hand needle. Knit in the back leg of the stitch.
- Right Lifted Increase: Insert the right-hand needle in the right side of the stitch 1 row below the stitch on the left-hand needle. Lift it and place on left-hand needle. Knit in the front leg of the stitch.
- A mnemonic device for remembering which is which: Use the left needle to complete a left lifted increase; and the right needle for a right lifted increase.
—revised February 2 , 2019
- M1: Make 1 is very popular and it is a quick, neat and fairly invisible way to increase. There are a lot of good books that include how to do an M1. My friend, Linda, asked me to put these on this page for easy access because she finds these directions very good.
Here are five ways to invisibly increase.
- M1L produces a left-leaning stitch. With left-hand needle, pick up the strand between the needles from front to back. Knit in back loop.
- M1R produces a right-leaning stitch. With left-hand needle, pick up the strand between the needles from back to front. Knit in front loop.
- M1P-R creates a purl stitch with a right-leaning stitch on the knit side. On the purl side, with left-hand needle, pick up strand between the needles from back to front. Purl in front loop. (This is shown in the image to the right.)
- M1P-L creates a purl stitch with a left-leaning stitch on the knit side. On the purl side, with left-hand needle, pick up strand between the needles from front to back. Purl in back loop. (This is not shown in the image to the right.)
- M1o (M1 open) produces a small hole, smaller than a yarn over. Pick up the yarn between the stitches and knit it without twisting. (Thanks to Linda M of the NOPL Knitters at Night for this!)
- Easier M1: Some knitters find that M1s are a little too tight to work. If you are one of them, try this: On the previous row, knit to where the M1 should be and yarn over. Now when you come to the yarn over, knit into the back or front loop as required. Be sure to remount the yarn over if working an M1R.
—updated June 16, 2025
- For absolute symmetry when increasing at the beginning and end of a row, for example, use M1L on one side and M1R on the other.
—added March 24, 2013
- Yarnovers:
- To yarn over between knit stitches, bring the yarn to the front, then over the needle and to the back.
- To yarn over between purl stitches, bring the yarn to the back and purl the next stitch. It may be necessary to loosen the yarn after purling the stitch.
- To yarn over after a purl and before a knit, no winding is necessary. Purl the first stitch and then knit the next stitch by bringing the yarn over the needle (instead of bringing the yarn to the back between the needles).
- To yarn over after a knit and before a purl, bring the yarn to the front, then over the needle and to the front again. Purl the next stitch.
- To work a double (multiple) yo, end any of the yarn overs above by wrapping the yarn one full turn around the needle.
—added June 16, 2012
Intarsia
- A lot of intarsia patterns suggest winding the different colors of yarn around bobbins. These hang from your work as you knit and get tangled together. Instead of yarn on bobbins, cut an arm's length or two of yarn and work with these lengths. Then, when they get tangled, you can just pull them through. I still use little balls of yarn for those areas where a lot of one color is required, but use the long pieces for the smaller one-color areas.
- A drawback to intarsia is joining new colors and then working the stitches to create stable stitches when the piece is completely knitted. To help with this, keep the tail of the new color in the front until you are ready to weave it in. It will take less fuss to work those ends in properly. And there are no gaping holes as you knit away at your design/picture.
So, whether you are working on the right or wrong side and are ready to join a new color, bring the yarn of the new color from the front to the back. Lift the old yarn over and to the left of the new yarn. Start knitting with the new yarn.
—added November 13, 2011, from Sheila Farley of the NOPL Knitters
Joining Yarn
- A lot of knitters join a new ball of yarn at the edge of their knitted piece. They stop with the old and simply pick up the new. There are two problems that I can think of that can arise using this method. If the edge is an afghan, for example, the edge will not be even. If the edge is at a seam, this small difference in the edge makes proper seaming just a bit more difficult.
Try this: Three or four stitches in from the edge, knit one (1) stitch with the old and new yarn together leaving 4 – 6" tails. Drop the old and continuing knitting. Then weave the yarn ends in as usual. The stitch will not appear bulky, nor will the ends come loose if properly woven into the fabric. And it is invisible on the public side. I have been using this technique for over 15 years and even join yarn in the middle of the piece.
- One more thought about joining yarn: Never, ever knot. Knots are evil and, according to Elizabeth Zimmerman, always wiggle their way to the right side. And knots do come undone.
—added May 19, 2016, from Knitting without Tears by Elizabeth Zimmermann
Knots
 To knot or not to knot, that is the question. Never, ever knot to join a new ball of yarn. The knot can work its way to the public side of the knitting (like bread falling butter side down).
If you come to a knot in that ball of yarn you are using, cut it. There are many good techniques for joining new yarn. And that knot in the new yarn WILL come out and you will have a little hole in your fabric. To knot or not to knot, that is the question. Never, ever knot to join a new ball of yarn. The knot can work its way to the public side of the knitting (like bread falling butter side down).
If you come to a knot in that ball of yarn you are using, cut it. There are many good techniques for joining new yarn. And that knot in the new yarn WILL come out and you will have a little hole in your fabric.
Here is a vest I knitted for Level 2 of the Master Handknitter program. One of the balls of yarn had a very small knot which I did not notice as I was knitting. When I put it on to have a picture taken, my husband asked what that hole was on the side. (Needless to say, it was a quiet evening as I had to purchase more yarn and knit another vest.)
—updated December 20, 2025
Kitchener Stitch: See Weaving
Lace
- After completing a row of lace knitting and finding that you forgot to make a yarn over, do not unknit the row. Just pick up the strand lying between the two stitches and put it on the needle and you have the missing yarn over!
- Use a lifeline. Every few rows, work a thread through all the stitches on the needle. Now, if you make a mistake and have to pull out several rows, you can pull back to your lifeline row and easily put the stitches back on the needle. The lifeline is even easier to put in place when using an interchangeable circular needle. Just thread the little hole that is used to tighten the needle to the cable and knit the row. Your lifeline will be pulled through the stitches as you knit.
Last Loop Fix
The last stitch of a bind-off row can be very loose. Here are several methods to fix this. Here is my favorite.
- When you come to the last stitch, slip it purlwise to right needle.
Insert the needle into the left leg of the stitch below.
Put stitch on right needle back to left needle.
Knit two together in the back legs and bind off.
Cut the yarn and insert the tail into the remaining stitch.
—added June 12, 2025
- Method for invisible ending on circular knits:
With the tail yarn,duplicate stitch the first stitch of the round so that it looks like a knit stitch. (Works with crochet, also.)
Left-over Yarn
- We all have extra yarn from our projects. It might be several yards or a half skein or more. Save the wrapper/band that came with the yarn and staple or tape a small length of the yarn to it. Then, when you want to buy more of that yarn that you used months ago, you will easily be able to identify it.
—added April 27, 2014
Miscellaneous
- Knitting a Circle
° The secret to knitting a circle in stockinette is the number 4. Increase 4 sts every row OR increase 8 sts every two rows OR increase 12 sts every three rows. You can continue by increase the stitch count by 4 and the row count by 1.
° The secret to knitting a circle in ribbing is the number 5. Increase 5 sts every row OR increase 10 sts every two rows OR increase 15 sts every three rows. You can continue by increase the stitch count by 5 and the row count by 1.
—added July 4, 2018

- Finishing the top of a circular piece knitted flat
Often, we knit a hat or a pair of mittens flat. The directions to end the work usually state cut the yarn leaving a tail and pull through the last few stitches. Our instinct is to pull the yarn through the first stitch on the last row and all subsequent stitches. Instead, pull the yarn through beginning with the last stitch. This tip will make a subtle difference.
° When you have finished knitting, move your stitches to the other needle. Your working yarn will now be coming from the last stitch on the needle.
° Pull the working yarn through the first stitch on the knitting needle and through all subsequent stitches. Tighten.
—added January 13, 2013
 Pom poms on hats often wobble no matter how tight you tie the ends. Try this easy solution. Cut a small ring from a flexible material. Quarter-inch foam will work. Punch to holes in the ring. Place the ring inside the hat. Thread one end of the pom pom through the top of the hat and through one of the holes. Repeat for the other end. Tie the ends together tightly. No more wobble. Pom poms on hats often wobble no matter how tight you tie the ends. Try this easy solution. Cut a small ring from a flexible material. Quarter-inch foam will work. Punch to holes in the ring. Place the ring inside the hat. Thread one end of the pom pom through the top of the hat and through one of the holes. Repeat for the other end. Tie the ends together tightly. No more wobble.
—added January 7, 2017
- Prevent heads on stuffed toys from wobbling. Cut a 1/4" dowel to a length equal to about half the head height plus 3 or 4 inches. As you stuff the body of the toy, place the dowel in the body. Continue stuffing around the dowel. If you knitted the head from the neck up, sew on the head. Continue stuffing around the dowel.
It is a little trickier if you have worked the head from the top down. You have to stuff it with the dowel coming out of the body and into the end. It is worth the effort because the toy's head will not wobble.
—added January 7, 2017
- Sometimes after working the first stitch in a row, the stitch below it looks oversized. One way to take care of this is to knit the first stitch normally; then work the second stitch and tighten it. (Knitters using double pointed needles often use this technique to avoid ladders.)
—added February 2, 2019
- Wool or Acrylic: Light a match and hold it under the yarn end. If it catches fire or simply has a charred end and smells like burning hair, it is wool. If is is acrylic, it will melt.
—added March 26, 2025
Neckbands
- Many patterns’ directions include binding off the back neck stitches. Then, when finishing, the knitter is told to pick up the sts for the neckband. Instead of binding off, place the stitches on a stitch holder. Now, instead of having to pick up the stitches, you can just slide the live stitches to the needle.
—added January 26, 2016
Patterns, Keeping your place
- Keep track of your place in a pattern: There are many ways to keep track of your place in a pattern or chart on which you are working. Some of us mark off the rows with a checkmark. Some use magnetic boards. Some use row counters or record the row with pencil and paper. I have used all of those methods. Then one day, I discovered highlighter tape. Think highlighter pens only so much better. Highlighter tape is removable and restickable; you can write on the tape and even erase what you have written. It draws your eye to the line of the pattern. It comes in a variety of colors.
- The tape peels off well, but sticks even better. To make it a bit easier to remove the tape, fold back one of the ends so that the sticky side joins. This creates a little tab so you will not have to pick at a corner with a fingernail or needle to lift up the tape.
—added July 2013
Picking up stitches
- When picking up stitches on a bound-off edge, do not go use the bound-off stitches. Insert the needle directly below the edge and pick up.
—added January 31, 2015 from Cast On magazine, February – April 2010
- When picking up stitches around a curve, yarn over, pick up a stitch, yarn over. When working back, be sure to knit in the back loop of the yarn over to twist it (to prevent a hole.
—added February 2, 2019 from Knitting Bag of Tricks
No-Purl Garter Stitch in the Round
- Knit to the end of the round. *At the beginning of the next round, bring the working yarn to the front; slip the next stitch; bring working yarn to the back; slip wrapped stitch back to original needle. Pull wrap tightly. Knit to end of round. You will be knitting on the inside of the piece. Repeat from *. You no longer have to purl to achieve garter stitch in the round!
—added January 26, 2019
 Purling Purling
- Did you know that most people purl looser than they knit? This can be a problem for people who are working an item that has knitting in the round, as well as purling in the round, like the kaleidocycle (pattern by Brent Annable) pictured here. Some of the segments are purled in the round. So that all of the segments are the same size, I purled those segments using a smaller needle.
—added May 7, 2012 from Cat Bordhi’s New Pathways for Sock Knitters
Ribbing
- If you have a loose column of knit stitches where the column is next to a column of purl stitches, try this. Work the knit stitches normally. Then when working the purl stitch immediately to its left, insert your right-hand needle into the stitch purlwise as you normally would, but wrap the yarn around the needle in the opposite direction—clockwise instead of counterclockwise—as you purl the stitch. On the next row, this stitch will present itself to you as a twisted knit stitch. Knit it through the back loop to untwist it. A little less yarn is used to make the purl stitch so the knit stitch tightens up a bit.
—added August 28, 2012 from Melissa Leapman’s Cables Untangled and Cast on, February – April 2012
- When you change color in ribbing, the purl bumps in the gutter will have two colors in them, which is not very attractive. To avoid this, when changing color, on the right (public) side, knit all of the stitches with the new color. On the next and subsequent rows, continue in your ribbing.
—added January 13, 2012
Seaming
- Seaming knits
Several years ago a presented a workshop on seaming knits to a local guild. This is the handout I prepared for the members. The handout includes
° Advice about tails
° Planning your knitting in preparation for seaming BEFORE you begin knitting
° Seaming Stockinette Stitch
° Joining yarn in the middle of a seam
° Garter Stitch seams
° Horizontal to Vertical Stockinette seams
° Horizontal Reverse Stockinette to Vertical Reverse Stockinette Seaming
° Horizontal Reverse Stockinette to Vertical Stockinette Seaming
—added September 10, 2018
- When assembling a sweater, work the pieces in this order.
1. Shoulder seams
2. Set in sleeves
3. Side and sleeve seams (working from the bottom to the underarm and cuff to underarm)
4. Neckband
5. Buttonband
—revised July 17, 2016
- Seaming Reverse Stockinette Stitch: This has its own page.
Click here for various techniques to use when seaming reverse stockinette.
—added September 8, 2013
- Seaming Garter Stitch: This has its own page.
Click here for various techniques to use when seaming garter stitch.
—revised May 29, 2017
- When seaming we often use pins (metal or wooden) to hold the pieces together and those pins often slip out of the fabric. All that carefully placement is lost. After you pin your seams, place a 2 or 3" strip of inexpensive masking tape over the pin perpendicular to the seam. The masking tape will not leave residue and keeps the seam in place. If you are afraid that the masking tape you have will leave residue, use highlighter tape or hair set tape (the pink stuff).
—updated May 17, 2012
- When setting in a sleeve, to help make the seam smooth, begin seaming in the middle leaving a long tail and working outward.
 —added June 17, 2013 —added June 17, 2013
- Some people do not like leaving long tails at the beginning of their work. Either the tail seems to get in the way or it gets beat up. In the latter case, it may seem like using “used” yarn to do the seaming. To avoid either of these issues, put the tail in a small, sealable bag and knit away!
—added June 20, 2013, tip from Lee Conant
Selvedges
- When you are knitting a piece that is to be seamed and the edges are in seed (moss) stitch, keep the edge that is going to be seamed in stockinette stitch. It is buried in the seam and will make seaming a lot easier.
—added February 10, 2012
Short Rows
Short rows are used to create curves in knitting. Most often, they are employed to turn a heel. When working short rows, a little hole will appear where the needles are turned. The technique, “wrap & turn, ” is used to close up that little hole. A great video to watch is Wrapping and Turning by Cat Bordhi.
- Work across the back to within 3 or 4 sts of the left-hand side. Yarn forward, sl 1 st as if to purl, yarn back, put slipped st back onto lefthand needle. Turn.
Knit (or purl) across to within 3 or 4 sts of right-hand side. Yarn back, sl 1 st as if to purl, yard forward, put slipped st bac on lefthand needle. Turn and work across row.
If you are doing a series of short rows for shaping of the bottom of a heel, you will usually work within one stitch of the slipped stitch and repeat. For a garment, the short rows may be worked to within several stitches of the last wrap.
When working across the row, as you come to a wrapped stitch, work the wrapped stitch together with the yarn it is wrapped with. You will have a tough time finding where you turned without holding your knitting up to the light.
—added March 25, 2015
 Marking Wrapped Stitches Marking Wrapped Stitches
As you wrap the yarn, place a bobby pin on it and snug it close to your work. It is not necessary to bring the bobby pin to the front when wrapping on a purl row. I do that because all wraps should be lifted from the right side.
Now, it is easy to see where your wraps are located and how many you have. In the image, you can see that there are 3 wraps on one side and only 2 on the other.
—added February 10, 2012- Use Short Rows when binding off shoulder seams. This will avoid the “stairs effect” and result in a smooth bind-off for weaving or even, live stitches for a 3-needle bind off. Click here for directions.
Slipping Stitches
- The general rule is to slip stitches purlwise. The exceptions are 1) when knitting an improved ssk or 2) when the pattern states to slip knitwise. —added August 12, 2014
Sock Tips
Swatching
- I do not know any knitters who like to swatch. It takes up time that we want to devote to our project. We swatch, though, because we know how important it is. How many times have you knitted a swatch and laid it to one side only to pick it up again and not remember what size needles you used. Here is a fool-proof way to always know what needle size you used.
After you have knitted one or two rows, knit a few stitches and then *yarn over, K2tog* for as many times as corresponds to your needle size. As you know, yarnover and K2tog will create a hole. So if you are using size 6 needles, you will have 6 holes!
When changing the needle size midway through the swatch, purl the number of stitches that correspond to your new needle size.
Here is an article about how to create a swatch.
—updated September 6, 2016
- Try a new (to you) cast on when you swatch. It will not matter if you do not like it; it is just a swatch.
—added June 14, 2017
Weaving
- Kitchener
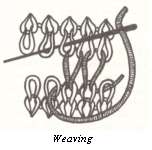
History records that the Kitchener stitch was invented by Herbert Kitchener, 1st Earl Kitchener, during World War I. Toes of knitted socks were seamed and a seamed toe is very uncomfortable. So Lord Kitchener devised a new sock pattern that incorporated a seamless toe that was grafted. To this day, we refer to that grafting technique as “the Kitchener stitch.”
Here are two sets of instructions that vary very little. Use the
instructions that are easiest for you to follow.
- Instruction set 1: Divide the stitches equally on two needles.With the wrong sides together, go down through the first stitch as if to purl at right-hand end of lower piece. Leave the stitch on the needle. *Insert the needle in the stitch on the upper needle as if to purl, pull up yarn and slip the stitch off the needle. Insert the needle in the next stitch on the upper needle as if to knit; leave on knitting needle. Insert the needle on the first stitch on the lower knitting needle as if to knit. Draw yarn up and slip the stitch off the knitting needle. Insert the needle in the next stitch on the knitting needle as if to purl; leave on the needle.Repeat from * until all the stitches are woven.
- Instruction set 2: Each step begins with "Insert yarn/tapestry needle." This will also avoid “ears.”
Step 1:
Purlwise on front needle (wrong to right side); leave on.
Step 2: Knitwise on back needle (wrong to right side); leave on,
Step 3: Knitwise on front needle (right to wrong side); drop off.
Purlwise on front needle (wrong to right side); leave on.
Step 4: Purlwise on back neede (right to wrong side); drop off;
Knitwise on back needle (wrong to right side); leave on.
- Repeat from Step 3.
—revised September 30, 2019
- Garter-stitch Kitchener
Grafting garter stitch together to join to pieces of garter stitch together is not too different then joining stockinette. With stockinette, the knit sides of both pieces are facing. With garter stitch pieces, one piece has the knit side of the row facing the other piece's purl side of the row.
Lower piece with purl side facing
Step 1: On lower needle, insert the needle purlwise (wrong to right side), leave on.
Step 2: On upper needle, insert the needle knitwise (wrong to right side), slip off; insert in next st purlwise (right to wrong side); leave on.
Step 3: On lower needle, insert the needle knitwise (right to wrong side), slip off; insert in next stitch purlwise (wrong to right side), leave on.
Step 4: On upper needle, insert the needle knitwise (wrong to right side), drop off;
insert needle in next stitch purlwise (right to wrong side), leave on.
Repeat Steps 3 and 4.
Purl bumps are formed on the upper needle; knit stitches are created on the lower needle.
 |
 |
 |
 |
| Step 1 |
Step 2 |
Step 3 |
Step 4 |
 |
 |
 |
|
| Weaving finished. Note the |
Right Side, stitches tightened, bumps are on the top. |
Wrong side. Bumps are on the bottom. |
|
—revised November 4 , 2019
 Learning Kitchener can be daunting, especially when you are taking the stitches off the needle one at a time. Try this to make it a lot easier: Run a lifeline through your stitches and slip them off the needles. A piece of all-purpose thread will do nicely. Lie them with the live stitches facing each other like in the picture above. Now the direction of the yarn needle is much clearer and you can see those “V’s.” emerge. Learning Kitchener can be daunting, especially when you are taking the stitches off the needle one at a time. Try this to make it a lot easier: Run a lifeline through your stitches and slip them off the needles. A piece of all-purpose thread will do nicely. Lie them with the live stitches facing each other like in the picture above. Now the direction of the yarn needle is much clearer and you can see those “V’s.” emerge.
—added November 5, 2011, from Lucille Snizek of the NOPL Knitters
|